Язык zpl на zebra
Небольшой путеводитель по ZPL
Добрый день, Хабрахабр.
Благодаря тепло принятой прошлой публикации, я могу опубликовать здесь эту статью. Спасибо всем, кто ставил плюсы.
По долгу службы мне частенько приходится формировать отчеты для этикеточных принтеров семейства Zebra. 
Зебры они такие
Механизм формирования этикеток выглядит следующим образом: сначала с машины пользователя (компьютер, терминал сбора данных) на принтер отправляется специальным образом оформленная строка, затем внутренний процессор принтера обрабатывает эту строку, и выводит ее на печать.Но язык, на котором формируется строка для принтера (называется ZPL) на первый взгляд вызывает у непосвящённых нервную икоту и мандраж.
Прошу под кат, всех кто хочет разобраться в данном вопросе.
Пример:
А на печать выводится такой аккуратный бейджик: 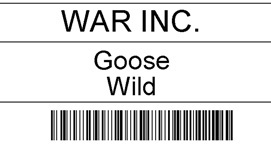
Давайте разберемся, что же написано в этом коде, и рассмотрим основные элементы.
Первую часть своего выступления я посвящу разбору синтаксиса этого языка, в объеме достаточном для создания этикеток удовлетворительного качества. Во-второй части, приведу примеры кода на Java и VisualBasic, для того, чтобы отправить этикетку на печать самостоятельно. На основе этих примеров, вы сможете самостоятельно построить свою програму, для печати.
Часть 1. Синтаксис ZPL
Во первых, все измерения в ZPL указываются в точках (points). Поэтому, для более ясного представления вы должны посмотреть в документации на принтер, какая у вас плотность точек на единицу измерения длины.
Сначала кратко пробежимся по основным командам, затем рассмотрим их более подробно в связке.
1. Начало и конец ZPL-кода:
^XA – начало кода, ^XZ – конец кода;
2.Отступы для последующего содержимого:
^FO x,y где: x – отступ от левого края, y – отступ сверху;
3.Разделитель полей:
^FS — обозначает конец определения поля. Буквально можно считать его сигналом конца строки;
4.2. Вывод текста с параметрами указанными в предыдущем пункте:
^FD
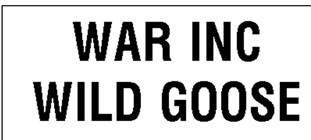
Повернем, и изменим шрифт:
Изменим шрифт на S:
Обязательно запомните, что разные шрифты могут выглядеть по разному, в отношении размеров, как можно видеть выше. Я чаще всего использую шрифт S.
5.Блок текста:
Изменим код, чтобы было две строки, и расстояние между строчками сделаем в 10 точек:
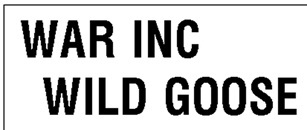
А теперь сделаем отступ для второй строки в 30 точек влево:
6. Рисование прямоугольников:
Если хотим нарисовать просто линию, то рисуем прямоугольник с высотой равной 0:
7.Штрихкод состоит из трех команд – первая задает его размеры, вторая настройки и третья — содержание:
^BC – штрихкод в стандарте 128 (подробнее Code_128); Есть также еще несколько форматов, но ввиду того, что мне не приходилось ими пользоваться, в данной статье они рассматриваться не будут, и рекомендую посмотреть информацию по ним в официальной документации поставляемой к принтерам Zebra;
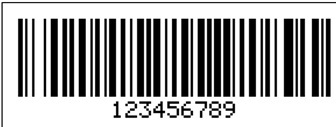
7.3. Вывод штрихкода на печать:
^FD
К сожалению, штрихкод нельзя поместить в «коробку», как текст, чтобы отцентрировать по ширине этикетки, и поэтому приходится шаманить с полями и отступами.
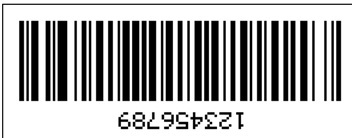
Перевернем, и укажем печатать расшифровку сверху (сейчас получилось снизу):
На этом остановимся на рассмотрении основных элементов ZPL, и перейдем к части второй, в которой вкратце рассмотрим механизм отправки информации на принтер.
Часть 2. Печать
Механизм передачи проще некуда. Для этого, мы должны знать IP, где находится принтер, и порт. Далее, формируем поток, который отправляем по указанному адресу, и получаем на выходе этикетку.
Пример на Visual Basic:
Как видите, ничего сложного. Надеюсь, что моя статья, облегчит путь отважным укротителям Зебр.
Засим позвольте откланяться. Жду советов, критики и поддержки.
Zebra Programming Language
Для наглядности команды я буду выделять жирным шрифтом, параметры постараюсь сделать цветными. Введенный текст и передаваемые переменные оставлю обычными.
Простейший пример
Пояснения
Результат
Пример файла для печати
На каждый параметр можно кликнуть чтобы перейти к подробному описанию. Либо просто пролистать вниз.
^XA ^PW366 ^CI28 ^RW24,24,A2 ^FS ^RS8,B10,200,3,E ^FS ^RB96,8,3,3,24,20,38 ^FS ^RFW,E ^FD48,0,5,6438092,0,#Serial# ^FS ^FN3^RFR,H ^FS ^HV3 ^FT8,24^A0N,26,26^FD#ProductCode# ^FS ^FO8,36^A0N,26,26^FB300,10,,100^FD#ProductName#^FS ^FT8,105^A0N,26,26^FD#Quantity#^FS ^FT130,105^A0N,26,26^FD#UnitOfQuantity#^FS ^FT8,128^A0N,26,26^FDASK.QA^FS ^FT9,128^A0N,26,26^FDASK.QA^FS ^FT134,128^A0N,26,26^FD#Serial#^FS ^FT134,128^A0N,26,26^FD#Serial#^FS ^XZ
Пояснения
Accepted values: 0 = None
1 = EPC Class 0
2 = EPC Class 0 Plus
3 = EPC Class 1 64-bit
4 = EPC Class 1 96-bit
5 = ISO 18000-06B
Default value: 4
Because some countries restric the frequencies that can be used for RFID, not all tag types listed may be supported by your RFID printer. If you specify a tag type that is not supported, the printer will use the default value.
This parameter sets the read/write position of the transponder in one of two ways: absolute mode or relative mode. For more information about these modes, see Setting the Programming Position Manually on page 19 of RFID Programming Guide 2 Manual.
Important: If a label format specifies a value for the programming position, this value will be used for the programming position for all labels untill a new position is specified or until the transponder calibration procedure is run.
Absolute Mode:
xxxx = 0 to label lenght (in dot rows). Move the media to the specified position xxxx on the label, measured in dot rows from the label top, before encoding. Set to 0 (no movement) if the transponder is already in the effective area without moving the media.
Relative Mode Forward:
Fxxx = F0 to Fxxx (where xxx is the label length in millimeters or 999), whichever is less). Move media forward, printing bitmap, for xxx millimeters before reading or encoding.
Relative Mode Backward:
Byy = B0 to B30 (in millimeters, 30 mm maximum). Move media backward for yy millimeters before reading or encoding. (Does not apply to the RP4T printer.)
Note: When using a backward program position, allow enough media or liner to ensure that the printer can back up the media wihout the leading edge disappearing under the printhead mechanism.
F0 (which moves the leading edge of the label to the print line)
Таким образом мы показали, что 96 бита раделены на шесть полей содержащих 8, 3, 3, 24, 20, 38
Разделение на поля происходит, естественно, не произвольным образом. В данном примере идёт печать тега в соответствии со стандартом SGTIN-96.
Что означают параметры 48,0,5,6438092,0,#Serial# после ^FD с первого взгляда непонятно. В описании у ^FD всего один параметр
Объяснение:
То есть нужно рассматривать всю комбинацию команд.
И при этом не забывать, что мы записываем теги в соответствии со стандартом SGTIN-96
| Общая длина | Header | Filter | Partition | Company Prefix | Indicator/Item Reference | Serial Number |
|---|---|---|---|---|---|---|
| 96 | 8 | 3 | 3 | 24 | 20 | 38 |
| 48 | 0 | 5 | 6438092 | 0 | #Serial# |
In a stored format, use the ^FN command where you would normally use the ^FD (Field Data) command. In recalling the stored fromat, use ^FN in conjunction with the ^FD command.
# = number to be assigned to the field. Accepted Values: 0 to 9999
Default Value: 0
This command allows you to read or write to an RFID tag.
Note: When using this command to read a tag, you may use a field variable to print the tag data on the label or to return the data to the host.
Printers That Support This Command: RXi, R110PAX4
# = field number specified with another command. The value assigned to this parameter should be the same as the one used in another command.
Accepted values: 0 to 9999
Default value: 0
В предыдущей команде (^FN 3 ) у нас было значение 3. Видимо, поэтому и здесь у нас 3 (^HV 3 ). Но нужно прояснить.
n = number of bytes to be returned
Accepted values: 1 to 256
Default value: 64
Acceptable values: 0 to 3072 characters
Default value: no header
The ^FT command sets the field position, relative to the home position of the label designated by the ^LH. The typesetting origin of the field is fixed with respect to the contents of the field and does not change with rotation.
Note: The ^FT command is capable of concantination of fields.
| Parameters | Details |
|---|---|
| x = x-axis location (in dots) | Values: 0 to 32000 Default: position after last formatted text field |
| y = y-axis location (in dots) | Values: 0 to 32000 Default: position after last formatted text field |
| z = justification The z parameter is only supported in firmware version V60.14.x, V50.14.x, or later | Values: 0 = left justification 1 = right justification 2 = auto justification (script dependent) Default: last accepted ^FW value or ^FW default The auto justification option may cause unexpected results if variable fields or bidirectional text are used with ^FT. For best results with bidirectional text and/or variable fields, use either the left or right justification options. |
Description The ^FT command also sets the field position, relative to the home position of the label designated by the ^LH command. The typesetting origin of the field is fixed with respect to the contents of the field and does not change with rotation.
| Parameters | Details |
|---|---|
| x = x-axis location (in dots) | Accepted Values: 0 to 32000 Default Value: positiono after last formatted text field |
| y = y-axis location (in dots) | Accepted Values: 0 to 32000 Default Value: position after last formatted text field |
Text The origin is at the start of the character string, at the baseline of the font. Normally the baseline is the bottom of most characters, except for those with descenders, such as g, y et cetera.
Bar Codes The origin is at the base of the bar code, even when an interpretation is present below the bar code, or if the bar code has guard bars.
Graphic Boxes The origin is at the bottom-left corener of the box.
Images The origin is at the bottom-left corner of the rectangular image area.
When a coordinate is missing, the position following the last formatted field is assumed. This remembering simplifies field positioning with respect to other fields. Once the firest field is positioned, other fields follow automatically.
Язык описания печатных страниц
ZPL – Zebra Programming Language – язык описания печатных страниц, так называемый PDL (Page Description Language). Существует множество PDL. Практически каждый производитель принтеров имеет свой язык описания страниц. Такой язык позволяет описать страницу высокоуровневыми командами, которые будут интерпретированы принтером в низкоуровневые. Наиболее известный PDL – PostScript от компании Adobe. PDL позволяет описывать страницу объектами. Что делает программу не зависимой от конкретной аппаратной платформы печатающего устройства. Принтер получает команды на печать квадрата, символа или линии и нас не волнует, как это будет реализовано. Принтер сам знает, как это сделать. Вот в чем главное достоинство PDL.
Американская компания Zebra Technologies разработала ZPL главным образом для создания и печати этикеток. Этикетки могут содержать текст, штрих коды и простую графику. Такие этикетки печатаются специальными Zebra принтерами, которые применяются в торговле для печати квитанций и чеков.
Существует два стандарта: ZPL и ZPL ll.
Отличия
Основной причиной развития ZPL II было существенное сокращение времени между тем, когда принтер начинает получать данные и когда первый символ поступит на печатать. Это было сделано прежде всего путем изменения способа написания программ ZPL.
Стандарт ZPL II совместим со стандарт ZPL не на 100%. Но различия между ZPL II и ZPL минимальны. И, уже существующие программы на ZPL можно с легкостью модифицировать до уровня ZPL ll. Есть и обратная совместимость. То есть вы можете писать программы на ZPL ll под принтеры ZPL, естественно учитывая старый синтаксис.
Итак, вот два основных отличия между ZPL ll и ZPL:
1. В ZPL II данные форматируются сразу же как получены. А в стандартном ZPL форматирование не начнется пока не будет получена команда завершения форматирования ^XZ.
2. В ZPL ll появилось много новых команд:
^ JM, ^ LH, ^ LL, ^ LR, ^ LS, ^ PM, ^ PO, ^ PR и ^ PF
Синтаксис
Но, рассматривать язык программирования без примеров пустое занятие. Поэтому, я приведу код программы для печати простой этикетки, и мы рассмотрим синтаксис.
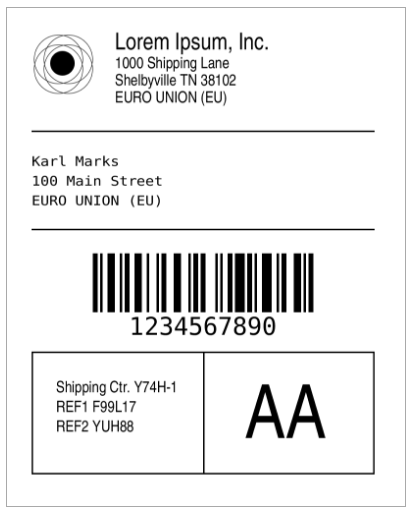
И получим в итоге такой талон для контроля доставки:
Как видите код начинается с тэга (команды) ^XA и заканчивается тэгом ^XZ. Код разделен комментариями на четыре секции для удобства рассмотрения.
1) В первой секции выводится логотип компании и ее юридические данные:
Понятно, что тэг ^FX означает комментарий.
^CF x, y, z – настройки шрифта по умолчанию: шрифт, высота и ширина.
Далее рисуем логотип из четырех кругов:
^GC x,y – нарисовать круг. Диаметр – x, толщина рамки – y.
^FD – поле данных.
2) Во второй секции новых тегов нам не попадается.
3) В третьей секции мы добавляем штрих код:
^BY x,y,z – ширина, ширина полос, высота.
4) В четвертой секции появился еще один тэг:
^GB x,y,z – прямоугольник. Ширина, высота, толщина рамки.
Вот таким небольшим набором тэгов мы описали всю печатную страницу. Согласитесь, ничего сложного. Нужно просто подбирать расстояние в точках. Все измерения тут именно в точках.
Конечно, мы рассмотрели очень малую часть команд ZPL, но теперь у вас есть некоторое представление об этом языке.
В интернете есть множество онлайн интерпретаторов ZPL кода. Так что вы всегда можете протестировать его визуально.
Zebra Programming Language
Введение
Zebra Programming Language это более новая версия Eltron Programming Language
В 1998 году компании Zebra и Eltron объединились
Простейший пример
Пояснения
Результат
Пример файла для печати
На каждый параметр можно кликнуть чтобы перейти к подробному описанию. Любо просто пролистать вниз.
Пояснения
Чтобы узнать правильное положение антенны и бэкфида, нужно выполнить RFID калибровку
Допустимые значения: 0 = None
1 = EPC Class 0
2 = EPC Class 0 Plus
3 = EPC Class 1 64-bit
4 = EPC Class 1 96-bit
5 = UCODE EPC 1.19
6 = Impinj Class 0 Plus
7 = ISO 18000-06A
8 = EPC Class 1, Generation 2 (Gen 2)
9 = ISO 18000-06B
Значение по умолчанию: 4
Because some countries restric the frequencies that can be used for RFID, not all tag types listed may be supported by your RFID printer. If you specify a tag type that is not supported, the printer will use the Значение по умолчанию.
This parameter sets the read/write position of the transponder in one of two ways: absolute mode or relative mode. For more information about these modes, see Setting the Programming Position Manually on page 19 of RFID Programming Guide 2 Manual.
Important: If a label format specifies a value for the programming position, this value will be used for the programming position for all labels untill a new position is specified or until the transponder calibration procedure is run.
Absolute Mode:
xxxx = 0 to label lenght (in dot rows). Move the media to the specified position xxxx on the label, measured in dot rows from the label top, before encoding. Set to 0 (no movement) if the transponder is already in the effective area without moving the media.
Relative Mode Forward:
Fxxx = F0 to Fxxx (where xxx is the label length in millimeters or 999), whichever is less). Move media forward, printing bitmap, for xxx millimeters before reading or encoding.
Relative Mode Backward:
Byy = B0 to B30 (in millimeters, 30 mm maximum). Move media backward for yy millimeters before reading or encoding. (Does not apply to the RP4T printer.)
Note: When using a backward program position, allow enough media or liner to ensure that the printer can back up the media wihout the leading edge disappearing under the printhead mechanism.
Значение по умолчанию:
F0 (which moves the leading edge of the label to the print line)
Таким образом мы показали, что 96 бита раделены на шесть полей содержащих 8, 3, 3, 24, 20, 38
Разделение на поля происходит, естественно, не произвольным образом. В данном примере идёт печать тега в соответствии со стандартом SGTIN-96.
^FD 48,0,5,6438092,0,#Serial#
Что означают параметры 48,0,5,6438092,0,#Serial# после ^FD с первого взгляда непонятно. В описании у ^FD всего один параметр
Объяснение:
То есть нужно рассматривать всю комбинацию команд.
И при этом не забывать, что мы записываем теги в соответствии со стандартом SGTIN-96
| Название поля→ | Общая длина | Header | Filter | Partition | Company Prefix | Indicator / Item Reference | Серийный номер |
|---|---|---|---|---|---|---|---|
| Длина в битах → | 96 | 8 | 3 | 3 | 24 | 20 | 38 |
| Что мы туда записываем → | N/A | 48 | 0 | 5 | 6438092 | 0 | #Serial# |
In a stored format, use the ^FN command where you would normally use the ^FD (Field Data) command. In recalling the stored fromat, use ^FN in conjunction with the ^FD command.
Format ^FN #
| Parameters | Details |
|---|---|
| # = number to be assigned to the field. | Допустимые значения: 0 to 9999 Значение по умолчанию: 0 |
| «a» = optional parameter* | Values: 255 alphanumeric characters maximum (a-z, A-Z,1-9 and space) Default: optional parameter |
Comments
The same ^FN value can be stored with several different fields.
If a label format contains a field with ^FN and ^FD, the data in that field prints for any other field containing the same ^FN value
For the «a» parameter to function as a prompt the characters used in the «a» parameter must be surrounded by double quotes (see example).
Example: The ^FN 1 «Name» would result in «Name» being used as the prompt on the KDU unit.
В нашем примере, вместо 3 могло стоять любое число. Главное потом указать тот же блок памяти в команде ^HV
This command allows you to read or write to an RFID tag.
Note: When using this command to read a tag, you may use a field variable to print the tag data on the label or to return the data to the host.
Printers That Support This Command: RXi, R110PAX4
# = field number specified with another command. The value assigned to this parameter should be the same as the one used in another command.
Допустимые значения: 0 to 9999
Значение по умолчанию: 0
В предыдущей команде (^FN 3 ) у нас было значение 3. Поэтому и здесь у нас 3 (^HV 3 ). Т.е. мы отсылаем обратно на сервер, то, что прочитали до этого с помощью ^RF
n = number of bytes to be returned
Допустимые значения: 1 to 256
Значение по умолчанию: 64
Acceptable values: 0 to 3072 characters
Значение по умолчанию: no header
The ^FT command sets the field position, relative to the home position of the label designated by the ^LH. The typesetting origin of the field is fixed with respect to the contents of the field and does not change with rotation.
Note: The ^FT command is capable of concantination of fields.
| Parameters | Details |
|---|---|
| x = x-axis location (in dots) | Values: 0 to 32000 Default: position after last formatted text field |
| y = y-axis location (in dots) | Values: 0 to 32000 Default: position after last formatted text field |
| z = justification The z parameter is only supported in firmware version V60.14.x, V50.14.x, or later | Values: 0 = left justification 1 = right justification 2 = auto justification (script dependent) Default: last accepted ^FW value or ^FW default The auto justification option may cause unexpected results if variable fields or bidirectional text are used with ^FT. For best results with bidirectional text and/or variable fields, use either the left or right justification options. |
Description The ^FT command also sets the field position, relative to the home position of the label designated by the ^LH command. The typesetting origin of the field is fixed with respect to the contents of the field and does not change with rotation.
| Parameters | Details |
|---|---|
| x = x-axis location (in dots) | Допустимые значения: 0 to 32000 Значение по умолчанию: positiono after last formatted text field |
| y = y-axis location (in dots) | Допустимые значения: 0 to 32000 Значение по умолчанию: position after last formatted text field |
Text The origin is at the start of the character string, at the baseline of the font. Normally the baseline is the bottom of most characters, except for those with descenders, such as g, y et cetera.
Bar Codes The origin is at the base of the bar code, even when an interpretation is present below the bar code, or if the bar code has guard bars.
Graphic Boxes The origin is at the bottom-left corener of the box.
Images The origin is at the bottom-left corner of the rectangular image area.
When a coordinate is missing, the position following the last formatted field is assumed. This remembering simplifies field positioning with respect to other fields. Once the firest field is positioned, other fields follow automatically.
Description The ^FB command allows you to print text into a defined block type format. This command formats an ^FD or ^SN string into a block of text using the origin, font, and rotation specified for the text string. The ^FB command also contains an automatic word-wrap function.
^FS
^FT8,105^A0N,26,26^FD#Quantity#^FS
^FT130,105^A0N,26,26^FD#UnitOfQuantity#^FS
^FT8,128^A0N,26,26^FDASK.QA^FS
^FT9,128^A0N,26,26^FDASK.QA^FS
^FT134,128^A0N,26,26^FD#Serial#^FS
^FT134,128^A0N,26,26^FD#Serial#^FS
^XZ
Основные команды
RFID калибровка
The ^BY command is used to change the Значение по умолчаниюs for the module width (in dots), the wide bar to narrow bar width ratio and the bar code height (in dots). It can be used as often as necessary within a label format.
| Parameters | Details |
|---|---|
| w = module width (in dots) | Values: 1 to 10 Initial Value at Power Up: 2 |
| r = wide bar to narrow bar width ratio | Values: 2.0 to 3.0, in 0.1 increments This parameter has no effect on fixed-ratio bar codes. Default: 3.0 |
| h = bar code height (in dots) | Initial Value at Power Up: 10 |
Example: Set module width (w) to 9 and the ratio (r) to 2.4. The width of the narrow bar is 9 dots wide and the wide bar is 9 by 2.4, or 21.6 dots. However, since the printer rounds out to the nearest dot, the wide bar is actually printed at 22 dots. This produces a bar code with a ratio of 2.44 (22 divided by 9). This ratio is as close to 2.4 as possible, since only full dots are printed.
Code 128 has three subsets of characters. There are 106 encoded printing characters in each set, and each character can have up to three different meanings, depending on the character subset being used. Each Code 128 character consists of six elements: three bars and three spaces.
^BC supports a fixed print ratio. Field data (^FD) is limited to the width (or length, if rotated) of the label.
Format: ^BCo,h,f,g,e,m Important • If additional information about the Code 128 bar code is required, go to


